Pole Dancing for Men: Breaking Stereotypes and Reaping the Benefits

Pole dancing is not limited by gender—pole dancing for men is gaining momentum as a full-body workout that challenges strength, endurance, flexibility, and creativity. More men are discovering the incredible physical and mental benefits of pole dancing. In this blog, we’ll explore why men should consider pole dancing a fitness option and how it can positively impact their overall well-being.


Why Should Men Consider Pole Dancing?


  1. A Full-Body Workout


Pole dancing requires strength, endurance, and flexibility—all components of a great workout. Men naturally have higher muscle mass and strength, which makes pole dancing a perfect match for their physical abilities. Unlike traditional gym workouts focusing on specific muscle groups, pole dancing challenges the entire body, including the core, upper body, and lower body. From climbs and spins to inverts and tricks, pole dancing provides a complete fitness routine that targets multiple muscle groups in every session.


  1. Improves Flexibility and Agility


While men are often concerned with building strength, flexibility is just as important, particularly for injury prevention. Pole dancing forces you to stretch, bend, and balance, helping to increase flexibility over time. This improved flexibility can translate into better performance in other sports and physical activities. Plus, pole dancing improves agility, coordination, and balance—important skills for any fitness routine.


  1. Mental Benefits and Confidence Boost


Aside from the physical advantages, pole dancing for men provides significant mental benefits. The intricate movements and focus required help improve concentration and discipline. Men who take up pole dancing report feeling more confident, as mastering pole tricks builds self-esteem and pushes personal boundaries. The creative and artistic side of pole dancing encourages men to express themselves and challenge societal stereotypes.


Male pole dancer on chrome pole dance stage in a home setting
Robin Demeyere – @rdemeyere (https://www.instagram.com/rdemeyere/)


Breaking the Stereotypes Around Pole Dancing for Men


Pole dancing has long been misunderstood as an activity primarily for women, but this misconception is being shattered. Men have always been involved in pole sports—take a look at pole champions like Dmitry Politov and Evgeny Greshilov, who have excelled in the sport and shown that pole dancing is not just for women. These athletes use pole dancing to demonstrate raw strength, control, and athleticism.


Pole dancing for men is about more than fitness—it’s about embracing a unique art form that allows creativity and expression while building physical strength. As more men enter the pole world, diversity and acceptance grow.
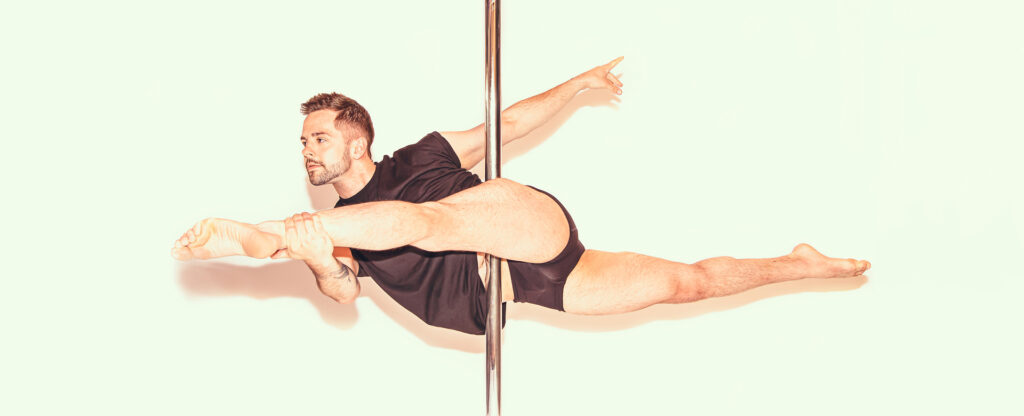
Male pole dancer on chrome pole on a plain white background
Jakub Kolasa – @the_pole_wizard (https://www.instagram.com/the_pole_wizard/)

How to Get Started with Pole Dancing for Men


  1. Find a Studio or Instructor


Many studios now offer pole dancing classes specifically designed for men or mixed-gender classes. Search for a local studio that embraces inclusive fitness and caters to men. Professional instructors will guide you through beginner techniques and help you build strength and confidence as you advance.


Check out X-POLE’s Studio Mapper here to search for your nearest studio.


  1. Invest in the Right Gear


While you don’t need a lot of equipment to get started, wearing the right gear is essential. Men’s pole dancing attire typically includes comfortable athletic shorts and a form-fitting top for a full range of motion and proper grip on the pole. You may also want to invest in pole grip products to prevent slipping as you build your skills.


  1. Be Consistent and Have Fun


Like any fitness routine, consistency is critical to improving in pole dancing. It can be challenging at first, but you’ll see rapid progress with dedication and regular practice. Remember to have fun with the process—pole dancing is not just about the workout but about discovering a new way to move and express yourself.
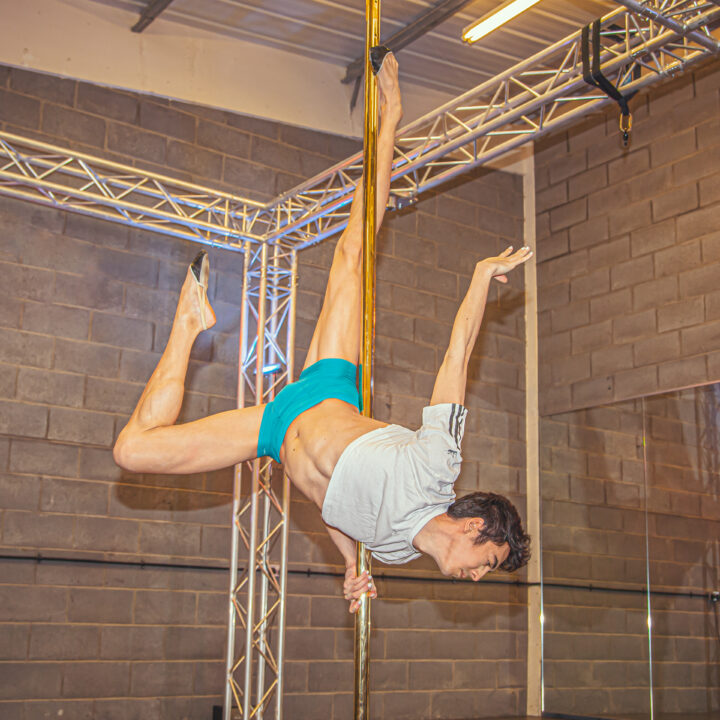
 

Male pole dancer on brass pole in a pole dance studio
Robin Demeyere – @rdemeyere (https://www.instagram.com/rdemeyere/)


Benefits of Pole Dancing for Men


– Builds strength and endurance through complex pole movements.

– Improves flexibility, agility, and coordination, improving overall physical fitness.

– Boosts mental well-being, confidence, and self-expression.

– Helps break gender stereotypes, opening doors to a unique and exciting fitness journey.

– Provides an inclusive environment where men can thrive and challenge themselves.

Dionysios Christofi – @hippy.dippy.dion (https://www.instagram.com/hippy.dippy.dion/)

Pole Dancing for Men: FAQs


Is pole dancing only for women?


Not at all! Pole dancing is a gender-neutral activity that both men and women can enjoy. It offers men significant physical and mental benefits, particularly in building strength, flexibility, and endurance.


Do I need to be strong to start pole dancing?


You don’t need to be super strong to start, but you will definitely build strength over time. As a beginner, you’ll focus on foundational moves and gradually progress to more challenging techniques as your strength and endurance improve.


How long does it take to see progress?


Like any fitness activity, progress depends on your consistency and effort. Most men begin to notice significant improvements in strength, coordination, and flexibility within a few weeks of regular practice.


Pole dancing for men is a powerful fitness option that combines strength, flexibility, and creativity into one challenging workout. It’s time to leave old stereotypes behind and embrace the world of pole fitness. Whether you’re looking to boost your physical fitness, improve your mental health, or find a fun and unique way to express yourself, pole dancing can offer an incredible transformation journey.


So, what are you waiting for? Pole dancing for men is here to stay—and it’s more than just a workout. It’s a lifestyle choice that empowers you to explore your strengths and unlock your potential.

How Do I Buy A Pole For Pole Dancing?

How Do I Buy A Pole For Pole Dancing?

Buying a pole is easy and fun with X-POLE! But, which pole is right for you? There are many options available, designed to suit all budgets and skill levels, so let’s get right into how to buy a pole for pole dancing.

The key things to consider are; Pole type (Static only, static and spinning, pressure mounted or freestanding), and the pole diameter and finish.

Static, spinning, or both?

Did you know that pole dancing poles can spin? That’s how some of the fantastic stuff you see online is done, with a spinning pole!

When starting out on their pole journey, most people start with a static only pole, such as the X-POLE SPORT pole. This gives you the chance to get used to being on the pole, using muscles you never thought you had to lift, hold and move around the pole.

As you progress and your skills improve, you might want to start adding spinning pole to your repertoire. This is where the X-POLE XPERT, XPERT Pro and X-STAGE Lite come into play.

The XPERT and XPERT Pro are removable home poles designed to be put up between the floor and ceiling of your chosen dance space; no drilling, screwing or permanent fixings into the floor or ceiling are required.

The X-POLE XPERT is the most popular pole dance pole globally, used by amateurs, enthusiasts and professionals all over the globe. Static and spinning modes come as standard with this one, with just a few turns of the hex screws located at the bottom of the pole. There are also a ton of variations available in different finishes and diameters, but we’ll get onto that in a bit.

Next up is the X-POLE XPERT Pro. This is the creme de la creme of home pole dance poles. The same functionality as our XPERT poles, but with our X-LOCK system added in, no need to adjust hex screws; just lift and twist the X-LOCK system and your pole goes from static to spinning. A lift and twist back, and your pole is in static mode again.

Lastly, we have the X-POLE X-STAGE Lite, the go-anywhere, freestanding podium pole. The X-STAGE is an excellent choice for someone looking to take their pole experience with them. Like the XPERT and XPERT Pro, the X-STAGE has spinning and static built-in but does not need to be mounted between the floor and ceiling of your chosen dance space. The X-STAGE is supplied with carrying cases to make transporting your stage easy and available in various diameters and finishes.

What diameter pole should I get?

While there are quite a few different diameters available on the market from other providers, we have stuck to two; 40mm and 45mm. But what’s the difference?

40mm diameter poles are great for beginners with less developed grip strength, kids and the more petite polers out there.

45mm diameter poles are the industry standard. They can be found in nearly all studios and at most competitions and exhibition events.

There’s a debate on whether you should start out with 45mm and “tough it out” rather than go a bit easier with a 40mm, but in the end, it’s all down to personal preference and what works for you!

Which pole finish is best? 

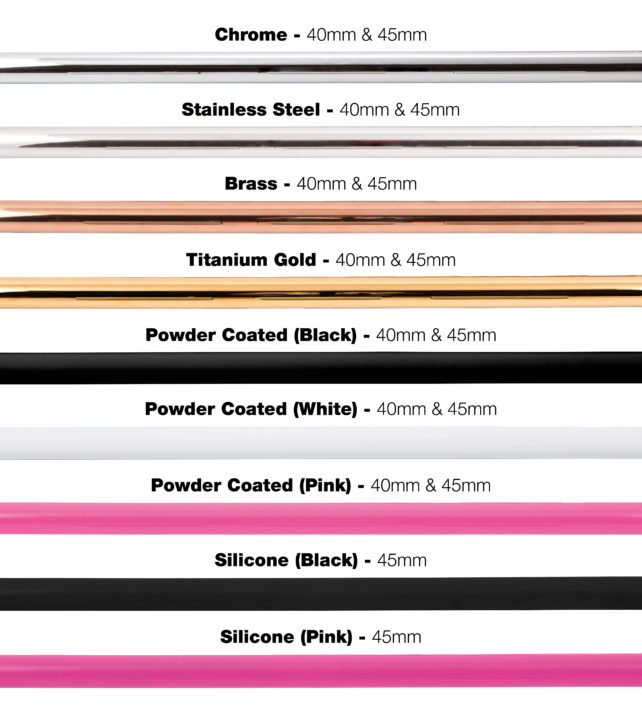
We have a wide range of finishes available for all our pole dance poles, including Chrome, Stainless Steel, Brass, Titanium Gold, Powder Coat and Silicone.

Here’s some essential info on each finish:

Chrome – The industry standard finish and a good all-rounder for all levels of skill/experience. High-grade steel poles are coated in Chrome and polished to a high finish.

Stainless Steel – A great alternative to Chrome or Brass and very hard-wearing. Also suitable for polers with nickel allergies and ideal for commercial environments (studios and gyms) with a lot of polers! Stainless Steel poles are polished to a mirror finish.

Brass is great in hotter climates as the grip factor increases with the ambient temperature and is the perfect choice for nickel allergy polers.

Titanium Gold – Chrome poles are taken and electronically coated with the finish for an enhanced grip.

Powder Coat (Black, Pink & White) – Useful for people who struggle to grip standard metal poles. Very high grip factor! Steel poles are powder coated and baked to seal the finish. Available in black, white and hot pink!

Silicone (Black & Pink) – The ultimate easy-grip pole! Steel poles have a silicone sleeve attached to the surface of the pole. Minimal skin to pole contact is needed. Available in 45mm pole diameter only.

Personally, my fav pole is the XPERT Pro 40mm Stainless Steel.

If you need help choosing your pole, give our sales team a call, and they’ll happily talk you through the options available to you.

Big News: X-POLE Stock Drops Incoming!

Big news and something to smile about in these trying times; we will be receiving stock drops throughout May and June and we will resume shipping in the United Kingdom and Europe (with the exception of France) by the 12th May.

All our most popular lines, including (but not limited to) SPORT, XPERT, XPERT Pro, X-STAGE and A-FRAME’s will be restocked and ready to ship by the end of May.

We will be fulfilling existing paid pre-orders on a first come, first served basis and then start processing new orders.

Now is the time to order your favourite X-POLE items to avoid disappointment, beat the lockdown blues and stay on top of your game or just have a hell of a lot of fun with your new purchase! Don’t forget to tag us on Facebook, Instagram and Twitter if you’re posting about your new item, we love to feature our brilliant customers in our feeds!

With lockdown procedures varying from country to country, we and our courier partners will try our best to deliver items, but we appreciate your patience and understanding during these unprecedented times.

Once an item has been dispatched, you will receive a notification from UPS, which can sometimes end up in your junk mail folder, so please keep an eye out, as the email will have your tracking number, which allows you to follow the progress of your order once it has left our warehouse.

There is a limited amount of technical support available from [email protected]; why not check out our FAQ’s, technical support page or YouTube channel for manuals, trouble shooting and instructional videos in the meantime.

Enquiries regarding orders can be directed to [email protected], our friendly and knowledgeable team will endeavour to respond within 48-72 hours.

Stay safe, stay home and stay well!

The X-POLE Team

The (Not So) Secret Diary Of A Pole and Aerial Hoop Beginner – Week Eleven

I am nearly three months into my Pole and Aerial journey. So far, it’s been an amazing and incredibly rewarding experience. My health, physical and mental, has improved dramatically. I am eating much more healthily and sleeping better too. I feel energised and better able to focus at work, so the benefits of this little experiment far outweigh any fears I may have had before it started.

Week Eleven – Pole

After the usual warm up with Hannah, we started out with a spin sequence as a recap of what we have done in previous sessions.

This included Step Around, Back Step and Cradle Spin. I’m really starting to feel comfortable with these now, along with the other spins we have learnt to date.

I also managed to do a climb to the top of the tallest pole in the studio! It was hard going, but I was determined to get to the top of the pole this week and lo and behold, I did! I was so pleased with myself, now I just need to work on the form and make it look good.

A lot of people have spoken to me about the dreaded Shoulder Mount since I started this journey. Well, this was the week for our introduction to it.

I positioned myself on the pole as Hannah had shown us and held my breath waiting for the pain to hit, but it never came!?! We were practicing Shoulder Mount Arch specifically, which is a little kinder on the shoulder as far as I understand it, but this seemed a lot easier and less painful that I could have imagined. Hannah was very surprised at my progress out of the gate with this one, which made me feel very proud of myself.

We finished of the session by revisiting our Inside Leg Hang. Inverting on to the pole and then positioning my legs was fine, it was when I put some actual weight on my hold that the pain arrived; it felt like a branding iron was being applied to my inner thigh and I’m not too shy to admit, I shouted an expletive I don’t care to repeat (it involved implying that the pole has intercourse with its mother, make of that what you will).

Honestly, my thighs were still burning a whole day later! Here’s a short video of me half-way achieving it:

Another great session this week, which has boosted my confidence on the pole another level.

Week Eleven – Aerial Hoop

The usual warm up resumed with Ellie resumed this week, sans the abs challenge from the last couple of weeks (my core was grateful!).

Front Balance was the first order of business this week. We practiced two different entries into this, a Backwards Invert and a Side Transition.

For me, the Backwards Invert went really well and I was pleased that I managed to get it in just one or two tires. The Side Transition was another story. Each time I tried to do this, I seemed to roll over my hand (painfully), maybe I wasn’t paying attention to Ellie when she was demonstrating this particular thing, but I’ll have to wait until week twelve before I can try again, as I’m on vacation from this Tuesday, so will miss out on my usual class this Wednesday.

We also tried Hip Holds. These proved to be a bit painful for me when transitioning into them, due to being a guy. Something else to work on in the next session too.

In preparation for Upside Down Man In The Moon, we revisited the standard Man In The Moon first. Ellie made the transition from standard to upside down look very simple, but when it came time for me to try, the hand positioning and movement proved a little difficult to grasp and unfortunately, I didn’t get a chance to nail this move.

Finally, just for fun, we revisited some of our favourite moves we have learnt to date and I chose to have another go at Pencil Hold on the bottom bar of the hoop. It didn’t feel as smooth as the previous times I had done it, but it was something.

<<< Previous Post – The (Not So) Secret Diary Of A Pole And Aerial Hoop Beginner – Week Ten<<<

The (Not So) Secret Diary Of A Pole and Aerial Hoop Beginner – Week Ten

Week Ten – Pole

I’m in double digits for weeks attended, I can’t believe how far I have come on this journey already and how rewarding it has been!

I’d also like to preface this post by saying this was without a doubt one of my best sessions so far, really felt like I achieved something and made progress, but more on that in a bit.

Hannah walked us through our usual warm up, before we moved on to climbs.

If you’ve read any of this blog series before, you’ll know I’ve never made it past two climbs on the pole and certainly not to the top of the pole. Well, this was my week (admittedly it was on one of the shorter poles in the studio), but I got to the top and hung out for a while quite comfortably, even giving the truss a tap for good measure (I know this is a no-no in most situations, but I couldn’t resist).

The next item on the agenda was Martini Sit. This looks deceptively easy (especially with Hannah pulling it off so nonchalantly), but I was in a for a rude awakening when it came to try it myself. The amount of butt/leg needed to really hang off the pole is the key here (not to self; buy shorter shorts!).

We then tried out a Step Around in to Back Hook. This didn’t prove too troublesome and I like to think my feet are nicely pointed while doing it (Hannah, any thoughts?).

I really nailed the next move; Inverted Crucifix! I got a good distance off the floor in my inversion and the hold on the pole was super solid, I was not moving anywhere unless I wanted to, which felt amazing. Coming down and the standing the ‘right way up’ again afterwards messed with my sense of balance a bit, but I reckon I’ll get used to it.

Finally, before we moved on to some stretching to end the class, I had another go at Butterfly. After the success of my Inverted Crucifix, this came a lot more naturally, still a little shaky, but I pulled it off none the less.

Week Ten – Aerial Hoop

Ellie started us out on our usual warm up and we moved to our usual conditioning.

We then started Single Leg Hang conditioning, which proved a bit painful after all the Martini Sits from pole previously, so I wasn’t able to hold it as long as I normally can or make any “pretty shapes.”

After this, Ellie talked us through a Side Seat Transition. I had visions of losing my grip and falling on to a most undesirable area on the bottom of the hoop, but thankfully my grip was great this week, so nothing to worry about.

Once we had this down, we moved onto a little combo consisting of Splits Away, the Side Seat Transition, into an Invert before finishing on a Front Balance. This was my first time really trying the Front Balance, so I was a little intimidated (flashbacks of the pain from Back Balance sprang to the front of my mind), but it turned out fine in the end.

After that, we worked on our under-bar shapes; Pencil, Split, Stag and Mexican.

Finally a little Gazelle practice to round out the session before some stretching and that was my hour up.

I realise I’ve been a bit lax with photos and videos lately, for anybody that’s missing them, I promise to remember to get more going forwards.

<<< Previous Post – The (Not So) Secret Diary Of A Pole And Aerial Hoop Beginner – Week Nine<<<

>>>Next Post – The (Not So) Secret Diary Of A Pole And Aerial Hoop Beginner – Week Eleven>>>

The (Not So) Secret Diary Of A Pole and Aerial Hoop Beginner – Week Eight

Week Eight – Pole

After the usual warm up session with Hannah, we went back to our flow sequence from the previous week, consisting of Step Around, Back Step and Step Around Pirouette.

All of it flowed pretty nicely for me on both sides except that damn Step Around Pirouette! I really must get to working on it at home, as it’s starting to annoy me that something that looks so simple is causing me so much grief!

We did add a Figure Four Spin to the end of the sequence too. Thankfully, this only took one or two tries to get for me, so it balanced out the frustration I was feeling from the Step Around Pirouette.

Not sure how many readers this next passage will apply to but none the less, here goes. Beard Oil is nobody’s friend when it comes to pole, even though I’d thoroughly washed my hands before class to get rid of any residue, my hands were still a bit slippery. My tip; stick to beard balm once in the morning for conditioning and hold on a pole day, unless you don’t mind arriving to class looking like an unkempt badger!

Back to the pole stuff! After the flow sequence, we revisited our inverts. This time, attempting a Butterfly. Getting up is fairly smooth for me now, I think my next aim is to really control the lift.

Anyway, I digress. On the first attempt at Butterfly, I was probably a bit too low on the pole, so it didn’t really go as planned. Second time around, my core wasn’t properly engaged and my back wasn’t particularly straight, by this point it was time to start the final stretch of the session so no more chances for another try, but I know what I need to do next session to get it right.

Week Eight – Aerial Hoop

Ellie started us out on our usual warm up, but hinted we’d be trying something a bit different towards the end.

The something a bit different turned out to be an abs and core workout choreographed to a song. While this was incredibly fun, after two minutes or so I was done in!

If you fancy trying it, check out the below video:

After this, we started on Back Balance to Birds Nest. I did pick up a lovely bruise on the top of my foot from the Birds Nest!

Ellie then showed us Secretary on the top of the hoop. After the Poisson from last weeks session, I felt pretty confident about this move from the start. The locking of your legs around the strop really makes you feel secure in place!

We did try Flying Secretary too, but as with Pole, we were close to the end of our session so I didn’t get to nail it this time around, may be next week.

I’ve just created a twitter account too, follow me here.

<<< Previous Post – The (Not So) Secret Diary Of A Pole And Aerial Hoop Beginner – Week Seven<<<

>>>Next Post – The (Not So) Secret Diary Of A Pole And Aerial Hoop Beginner – Week Nine>>>

The (not so) secret diary of a pole and aerial hoop beginner – Week Two

Week Two – Pole

After my first pole class, I couldn’t wait to get back to the studio and start training with Hannah again! All through the weekend before I had been thinking about it and making sure I remembered everything I had learnt from week one.

19:30 rolled around on Monday and I was ready to get back to it! As usual, we warmed up (after week one, I was able to follow Hannah a little better, but my coordination still needs some work!) and then began to do some conditioning on the pole.

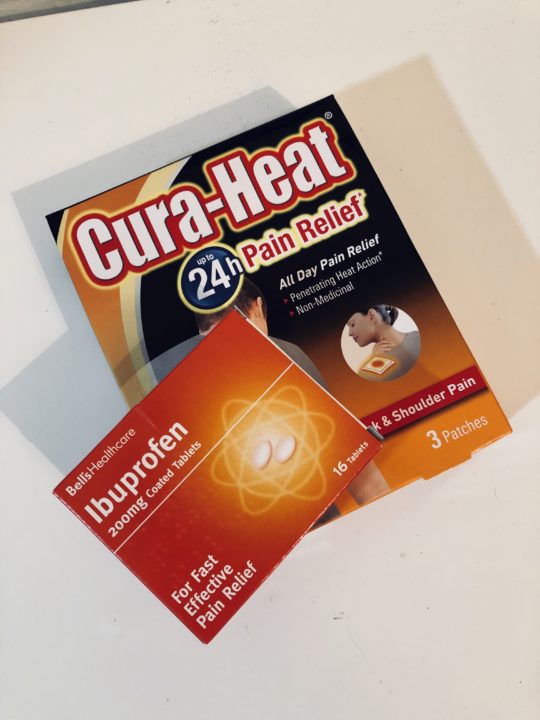
After being shown how to do a simple pull up on to the pole for conditioning, I attempted it myself, I suddenly felt an awful stabbing pain in my upper abdomen! I took a few minutes to get my breath back, had a sip or two of water and was ready to try again. But the pain came back! Hannah spoke to me and asked how I was doing, and I explained the problem. With concern she suggested I take an extended break before giving it another try. After the break, I tried one more time, but it was no good. Unfortunately, I had to cut week two of my pole adventure short. Hannah suggested I get myself home and do some gentle stretches to make sure I work out the issue. I also picked up some heat pads and a box of ibuprofen before heading home and calling it a night. I was absolutely gutted I couldn’t participate, as I’d been looking forward to class the whole week before, but as a lot of people have said to me since; “you have to listen to your body,” and mine was telling me to slow down for the meantime.

Bonus lesson: Aerial Yoga

After taking it easy for the rest of Monday and Tuesday, Wednesday loomed and my Aerial Hoop lesson with Ellie was getting closer. I was a bit worried that I might not have given myself enough time to recover from whatever I had done to myself in Pole two nights before.

A few colleagues suggested I try the aerial yoga class that takes place at Aerial Attic before my regular Hoop class, as its very relaxing and good for stretching. Aerial Yoga is something I have been intrigued by for quite some time, so I didn’t need much convincing!

I arrived to find my instructor for the lesson was the awesome Jessica Ashby, another X-POLE show/exhibition alum! Of course, I let Jessica know exactly what I had done in pole class two nights previous re my little injury.

I can’t even begin to describe how relaxing but fun the session was. Afterwards, I felt completely zen, thanks Jess! Also, thanks for the tip on proper breathing (i.e. exhaling when about to attempt a lift or exerting effort, this helped massively!).

Week Two – Aerial Hoop

I had about an hour to wait between my Aerial Yoga and Hoop class, so made sure I drank plenty of water and had a bit of a nibble on some fruit before heading back upstairs from the office to the studio. Being mindful of what I had done in my pole class, I did talk to Ellie and we decided to take it slow this week.

Ellie ran us through the warmup and stretching before getting us to do some conditioning on the hoops. Taking Jess’ breathing tip to heart, the pain was absolutely minimal, I could feel a slight pull still, but that was to be expected, I think.

We worked on what I had done last week, specifically Gazelle and Man In The Moon, but added transitioning into Amazon and also Double Knee Hang  

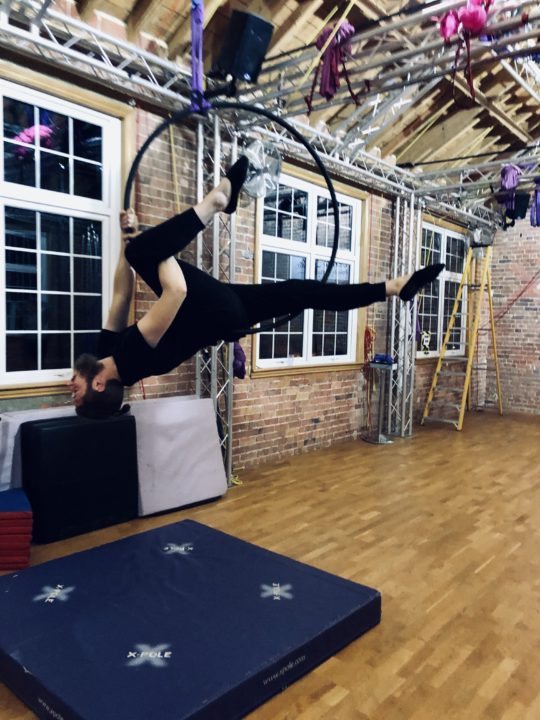
I must admit, this week, getting into the hoop and manoeuvring inside it felt a lot smoother for me. I think this was a combination of being used to the movement of the hoop (it still swings a fair bit when I get in, not got that nailed just yet, but I’m getting better) and the fear of falling is getting less and less the more I’m in the hoop. Getting out of the hoop without simply hopping down is something I still need to work on, but I am incredibly happy with my progress so far in both pole and hoop!

To sum up: always make sure you warm up properly, be mindful of your breathing, listen to your body and point those toes!

<<< Previous Post – The (Not So) Secret Diary Of A Pole And Aerial Hoop Beginner – Week One<<<

>>>Next post – The (Not So) Secret Diary Of A Pole And Aerial Hoop Beginner – Week Three>>>

STAINLESS STEEL VS. CHROME FINISHES – THE DEBATE

Steel or Chrome; it’s a question a lot of Polers ask themselves when selecting their first pole. Our UK Marketing Manager, Joey, writes a short blog to help you make what may be one of the most important decisions of your pole journey.

Being relatively new to the world of pole, I had to do some research into many aspects of the discipline, including the various pro’s and cons of different pole finishes. This time around, I decided to focus on Stainless Steel and Chrome, as they are two of the most popular finishes.

First up, what’s a pole finish? X-POLE has a range of finishes (Chrome, Titanium Gold and Powder Coated) as well as solid materials (Brass, Silicone, and Stainless Steel) that are polished to a high standard for the best possible grip.

A Stainless Steel pole is pretty much exactly what it sounds like. They are silver in color and are made of a combination of alloys (here comes the techy bit; Stainless Steels are iron alloys with a minimum of 10.5% chromium. Other alloying elements are added to enhance their structure and properties such as formability, strength and cryogenic toughness), and provide a super strong base for our poles.

Stainless Steel poles are highly polished to give a smooth and shiny finish. This produces a pole that is great for a variety of pole tricks and routines.

This finish can prove slippery for some people and also requires more grip strength to use, so may be more suited to a slightly more advanced user, but, this can also be a great investment for a new poler to push themselves and learn with equipment that will challenge them along their journey.

Chrome poles are also silver in color, but have a mirror finish. They are Steel poles that have been coated in Chromium to produce a beautifully shiny finish and are the most common poles seen in both studios/gyms and at competitions/events.

Chrome is naturally more ‘grippy’ than Stainless Steel, so is a very good choice for beginners, as it is more forgiving of weaker handgrip strengths and is also great for a variety of pole tricks, from inversions to leg holds.

The only thing to add here is that people who suffer from Nickel Allergies may not find Chrome poles suitable to practice on, as the coating will contain a small trace of Nickel.

To sum it up, if you are an absolute beginner looking to purchase your first pole and you don’t have a nickel allergy, Chrome finish poles are going to be your best bet, while those who do suffer from Nickel allergies would be advised to opt for a Stainless Steel pole. The important thing to remember is to have fun whilst using your pole!